Sometimes, you may find yourself needing to create new Magento Admin users for different members of your organization, in order to provide them access to your store's backend, so they can complete their tasks. Magento allows you to do this, while also setting different permission levels for each, allowing you to control the content each user can access and edit.
There are a couple of ways to go about creating a new Admin User in Magento 2:
- Directly via the Magento Admin
- Via the command line
1. Magento Admin
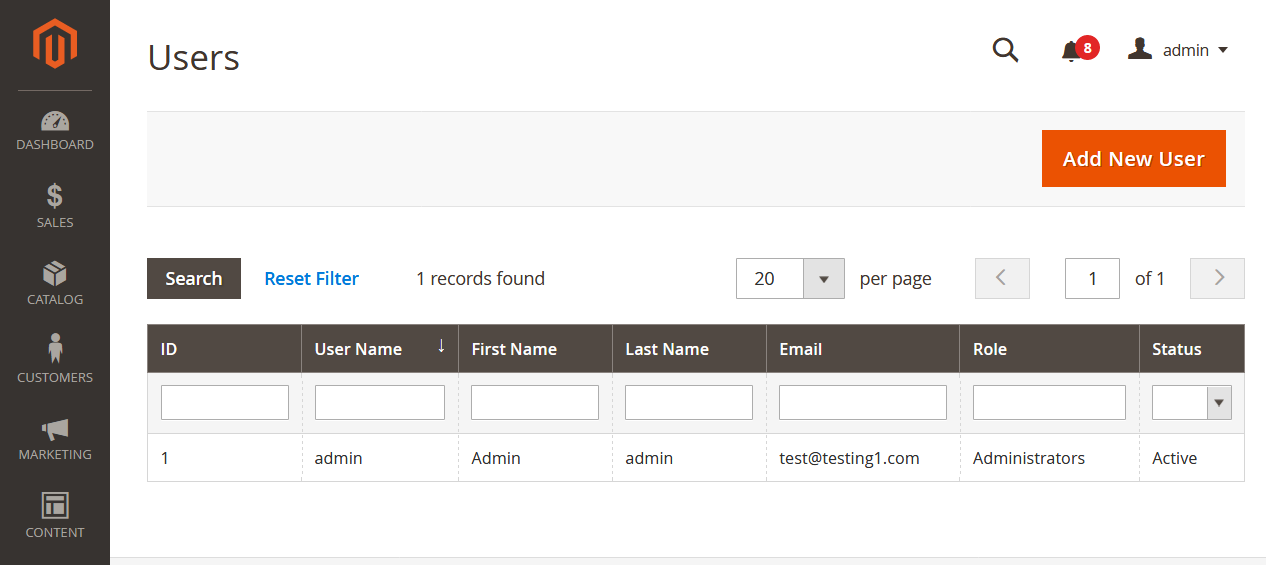
To create a new Magento 2 Admin user via the backend, simply head into Admin -> System -> Permissions -> All Users -> Add New User:
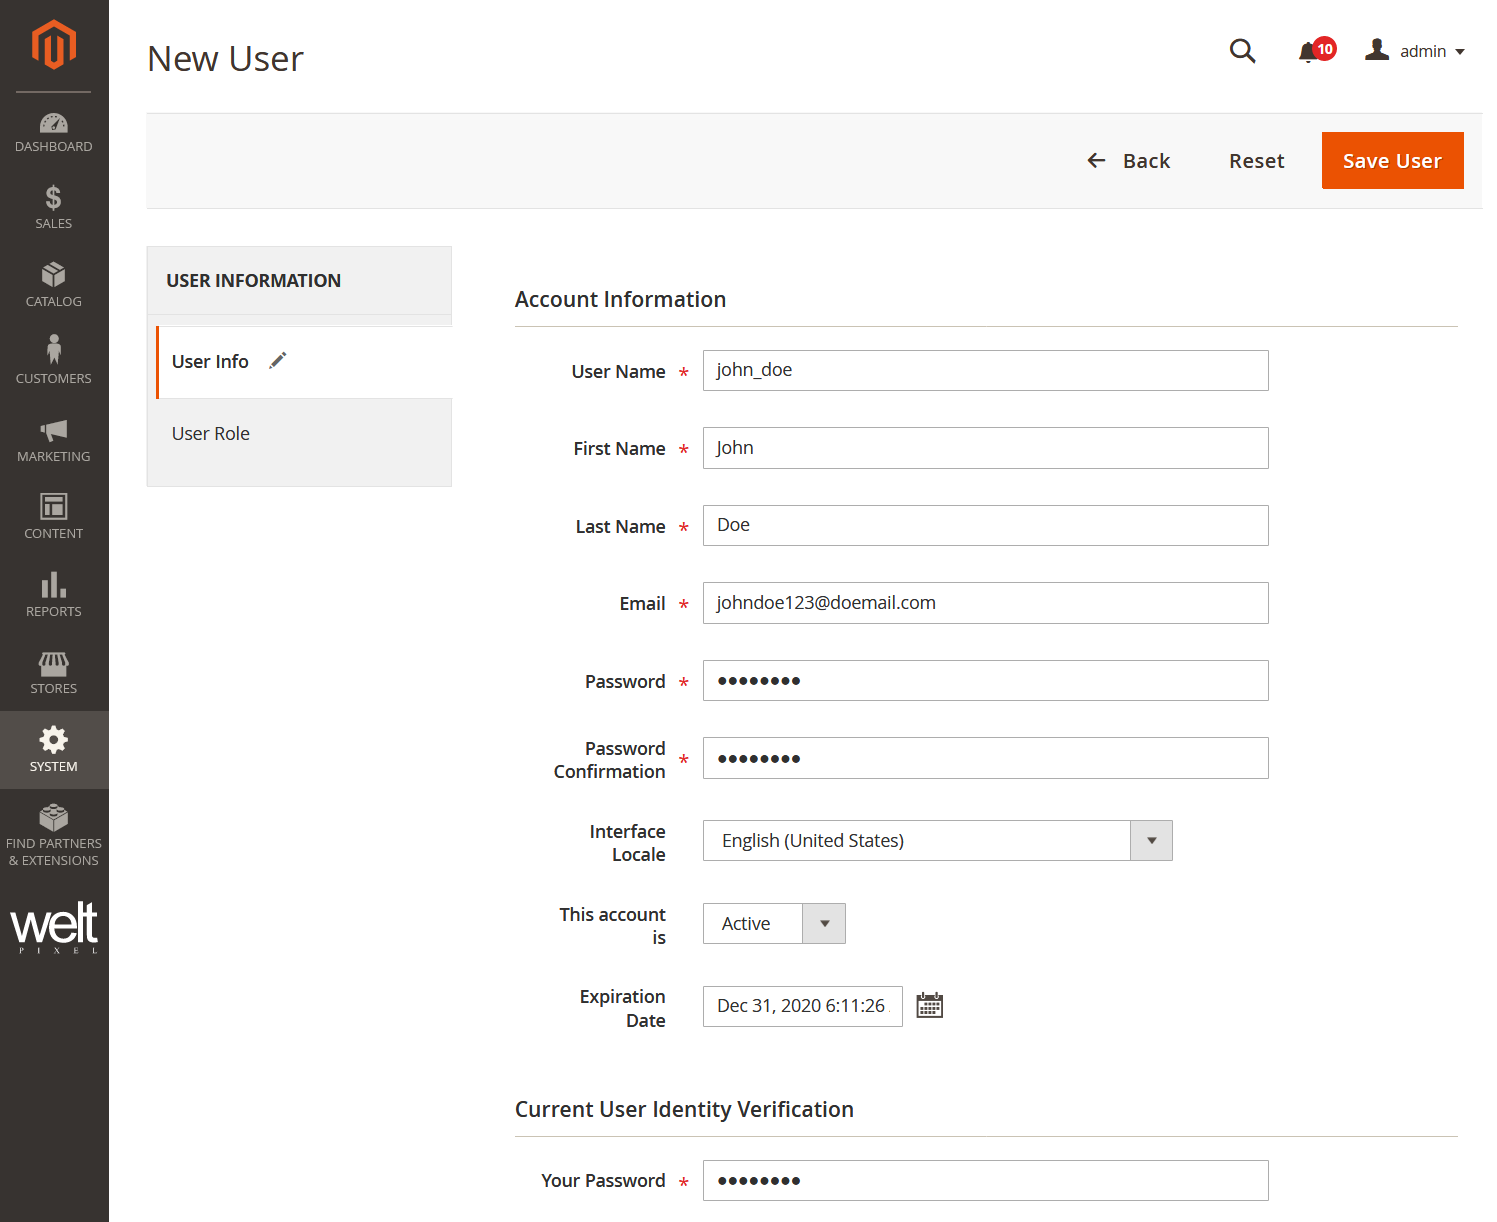
Next, fill in all the account information (keep in mind that the email address must be unique) for the new user, and confirm your current user's identity by filling in Your Password. This is required for you to be able to create a new Admin User.
In the Interface Locale section, you can select the language you want the backend to be displayed in for this user if your store has more than one language.
You can set the Expiration Date of the account if you want, just select the date in the calendar next to Expiration Date.
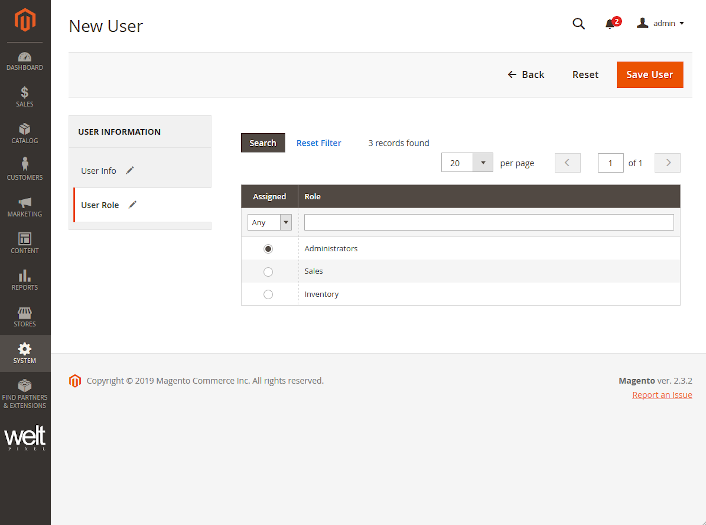
Next up, we'll head into the User Role section by using the menu on the left-hand side of the page. Here, we'll be able to select the role that we want this new user to have.
After assigning the new user to this role, click Save User. You'll be prompted with a success notification, and your new user will show up in the User List.
2. Command Line Interface
To create a new Admin User via the Command Line Interface, you'll need to connect to your server via SSH, and navigate to the root of your Magento 2 project. Once there, issue the following command:
php bin/magento admin:user:create
You'll then be prompted with a series of configuration variables:
- Admin user
- Admin password
- Admin email
- Admin first name
- Admin last name
After all the details have been filled out, you'll be prompted with a success message:

Editing or creating User Roles in Magento 2
You may find yourself needing to change up the permissions that your users have. This is quite easy to do in Magento 2. Just head into System -> Permissions -> User Roles. You'll find a list of your currently created User Roles here. You can either select a current role to change the permissions it has, or create a new Role. Let's create a new role for the sake of this tutorial. Just press the Add New Role button.

In order to create the new User Role, it requires a name, and your current password. Make sure you give the role a name that can be associated with it. For this example, we'll use Shipping.
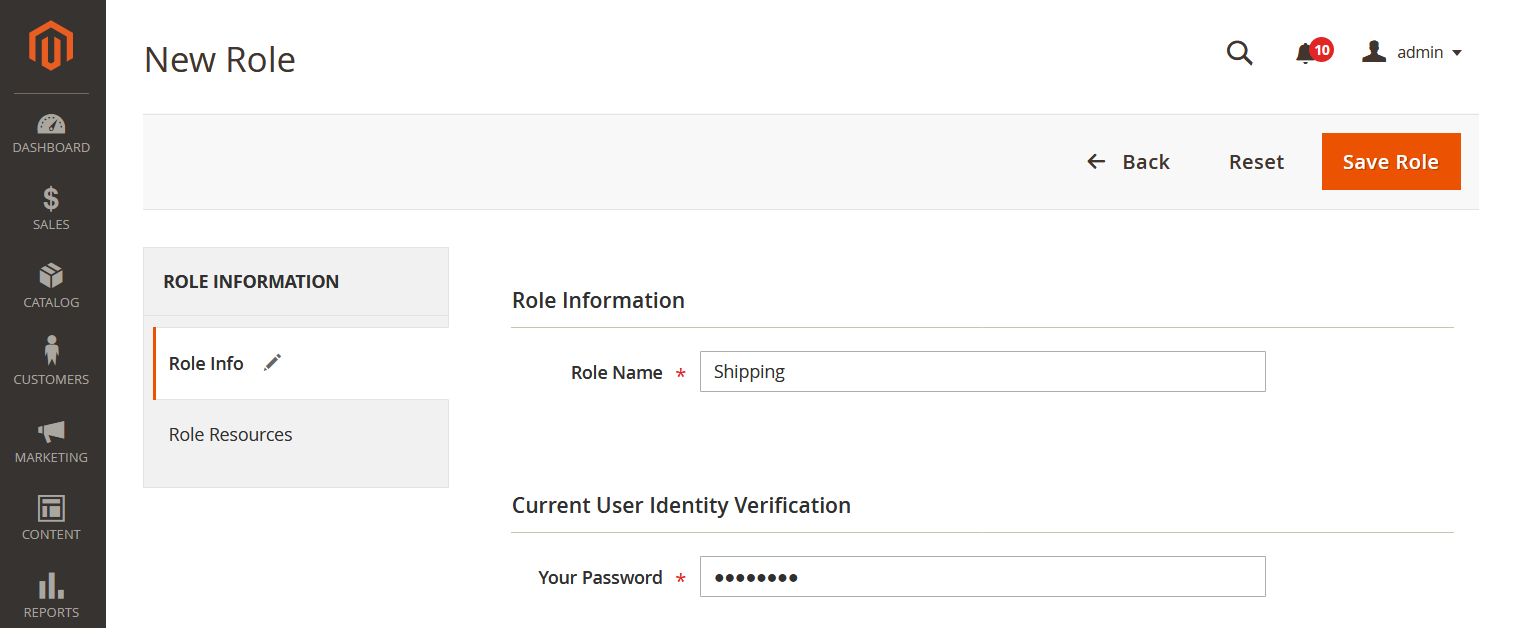
Afterwards, head into the Role Resources tab using the menu on the left-hand side of the page. You'll see a list of resources that you can select for the User Role to have access to. As our User Role is named shipping, we'll scroll down to find the Shipping section. Here, we'll be able to check the Shipping box, which will automatically check all the resources associated with it. Any of those can be unchecked, in case you need to restrict access to specific resources under Shipping. In our example, I've unchecked Carriers.
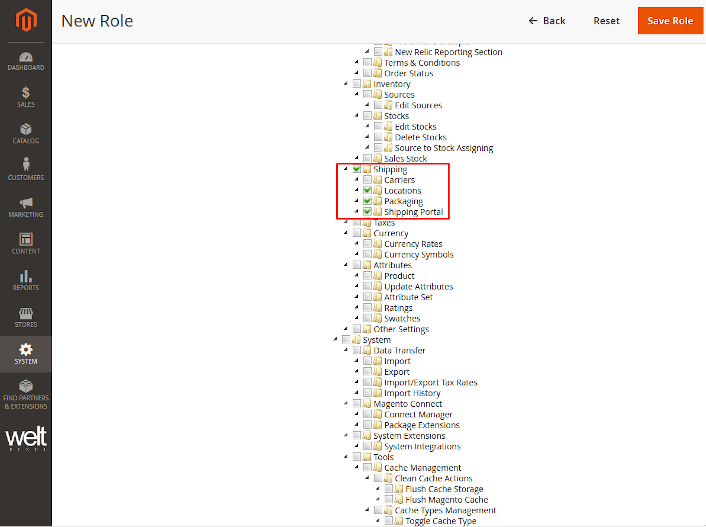
After you're done, simply click Save Role, and your new User Role will show up in the list of available Roles.
Congratulations! You've successfully created a new Magento 2 Admin User, and learned how to configure User Roles. If you're having fun with Magento 2, you might want to check out our extensions, or the Pearl Theme for Magento 2, which come with cool new features and functionalities that your store can use!
Comments
0 comments
Please sign in to leave a comment.